From the Live Dashboard tab, tap the name of the current dashboard at the top of the screen to open the dashboards menu. From there you can switch dashboard, create a new one, rename, reorder or delete the existing ones.
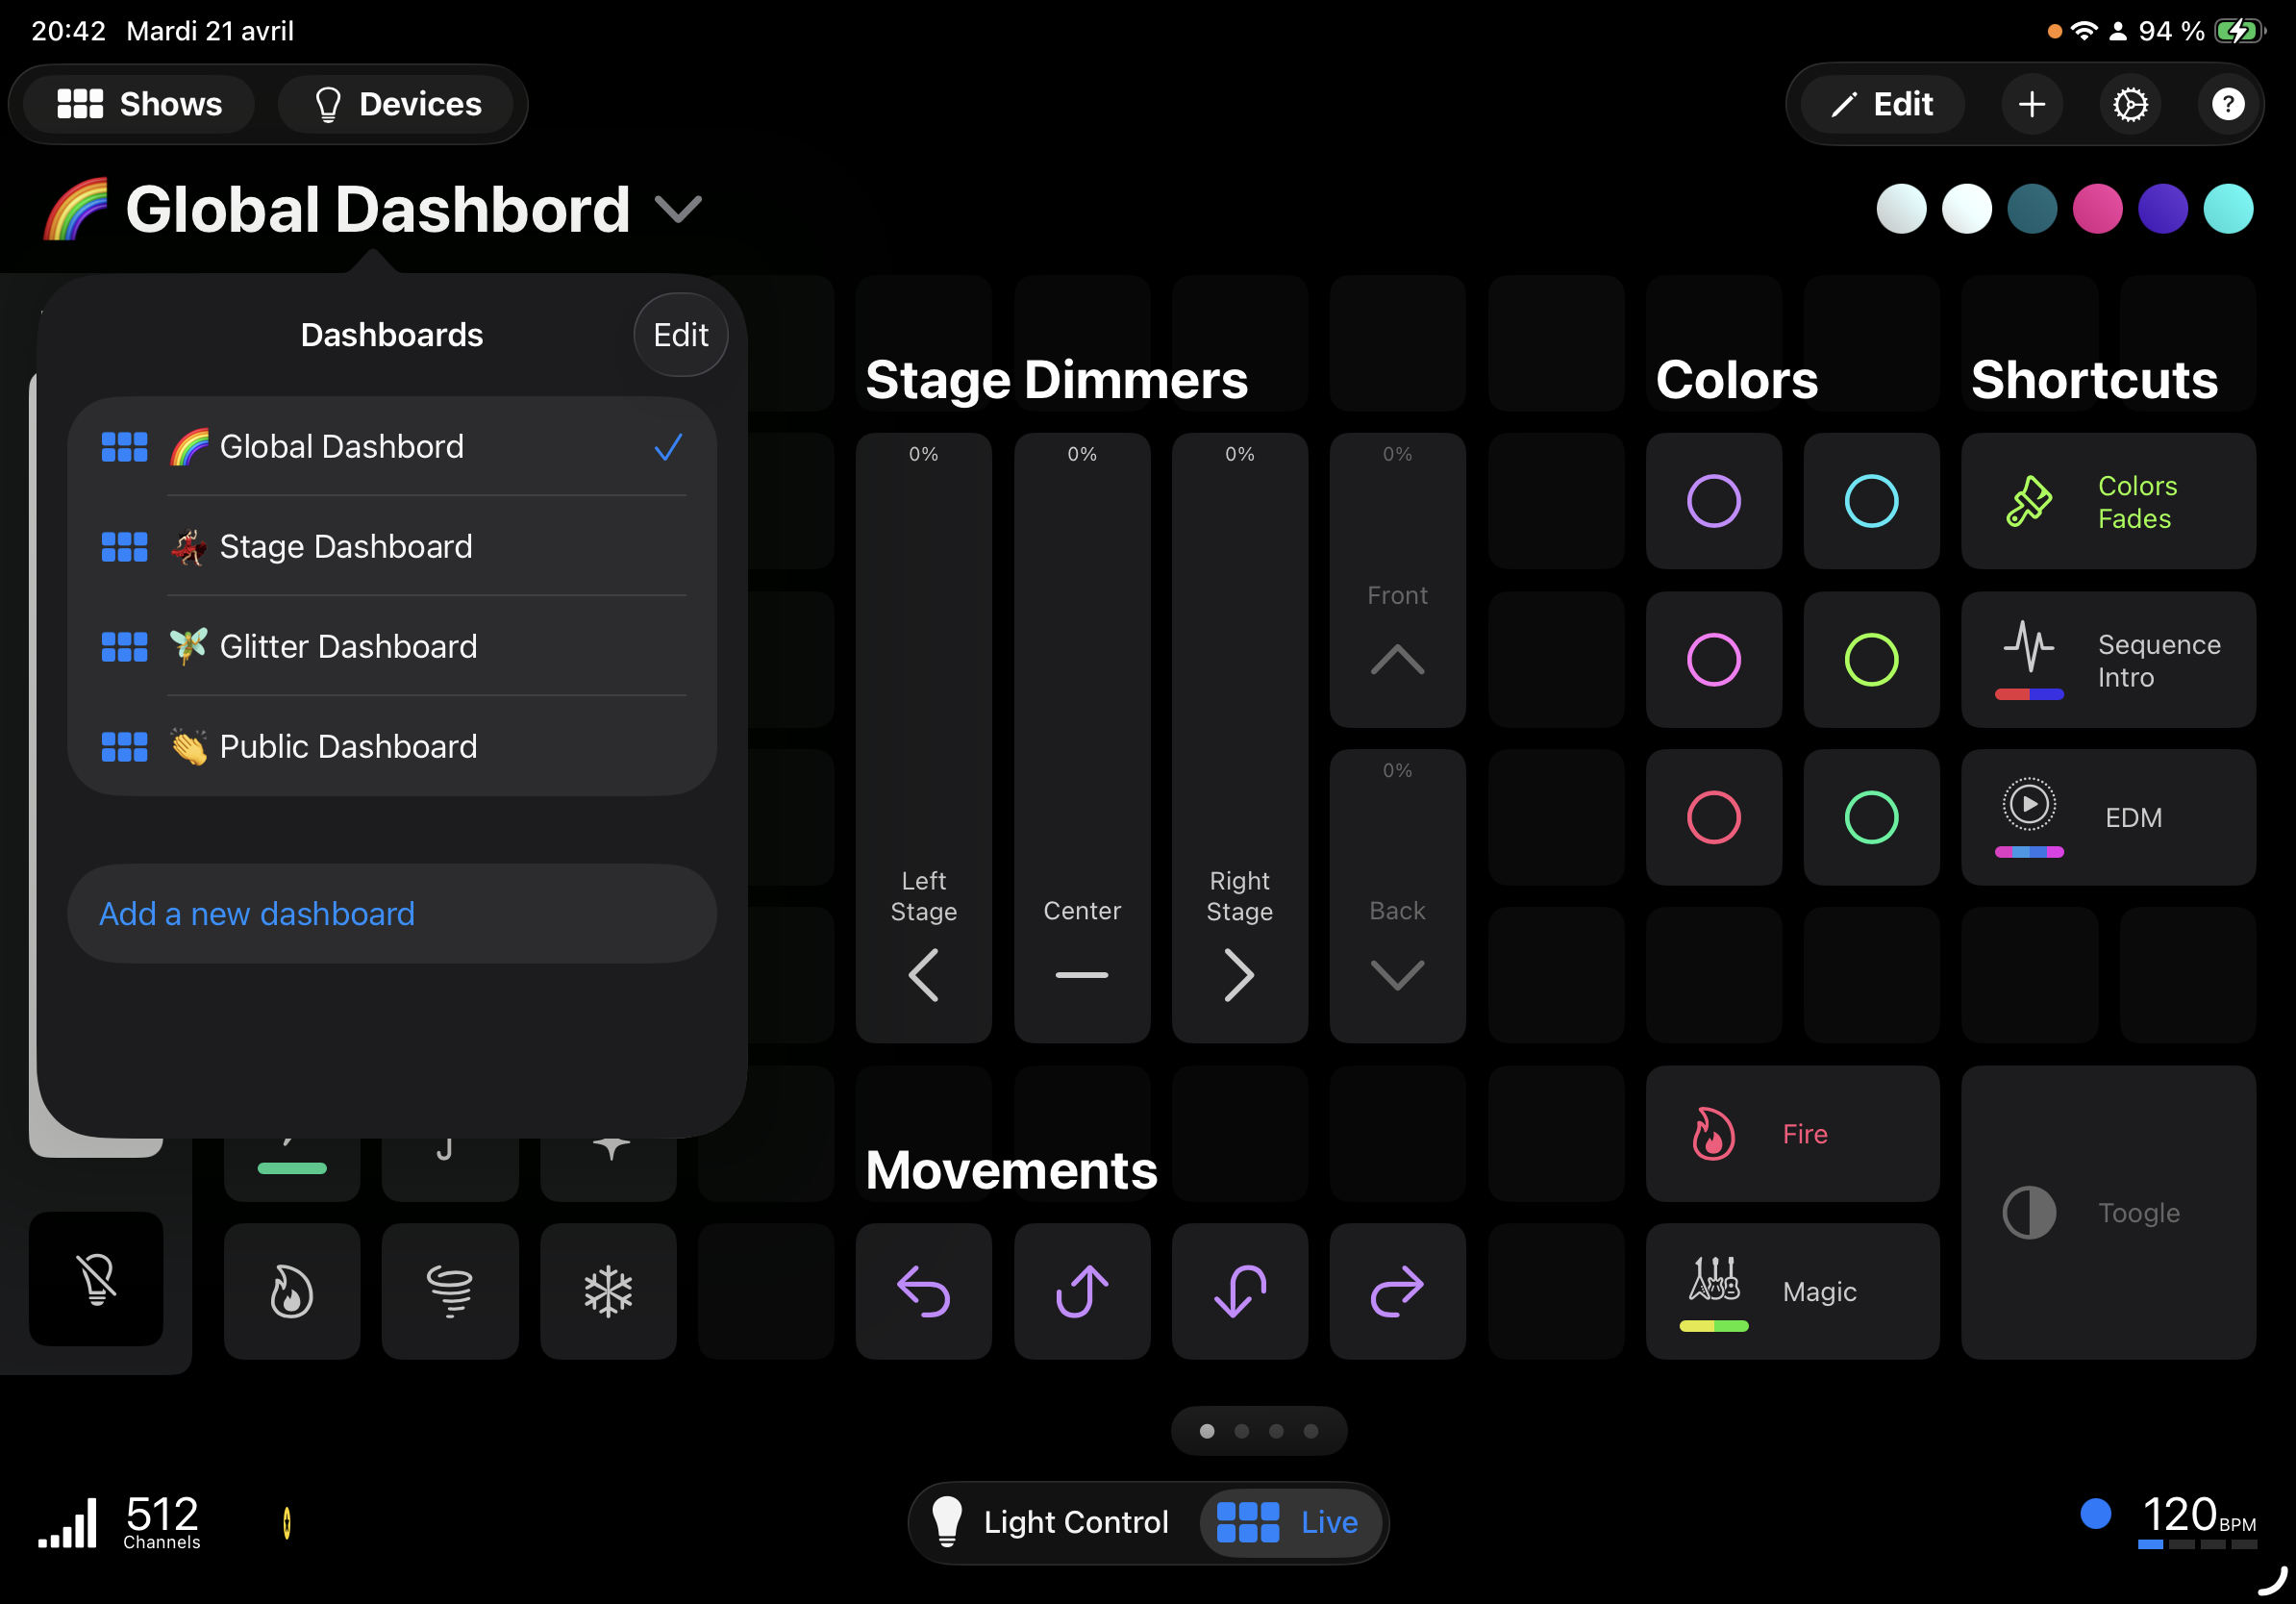
When you have more than one dashboard, page dots appear at the bottom of the Live view to show how many dashboards you have and which one is currently active.
In the dashboards menu :
Photon+ is required to keep more than one dashboard. Without an active subscription, the additional dashboards stay readable but are locked and marked with a yellow star.
You have two ways to navigate between your dashboards :
The selected dashboard is remembered between sessions, so the app reopens on the dashboard you were using last.
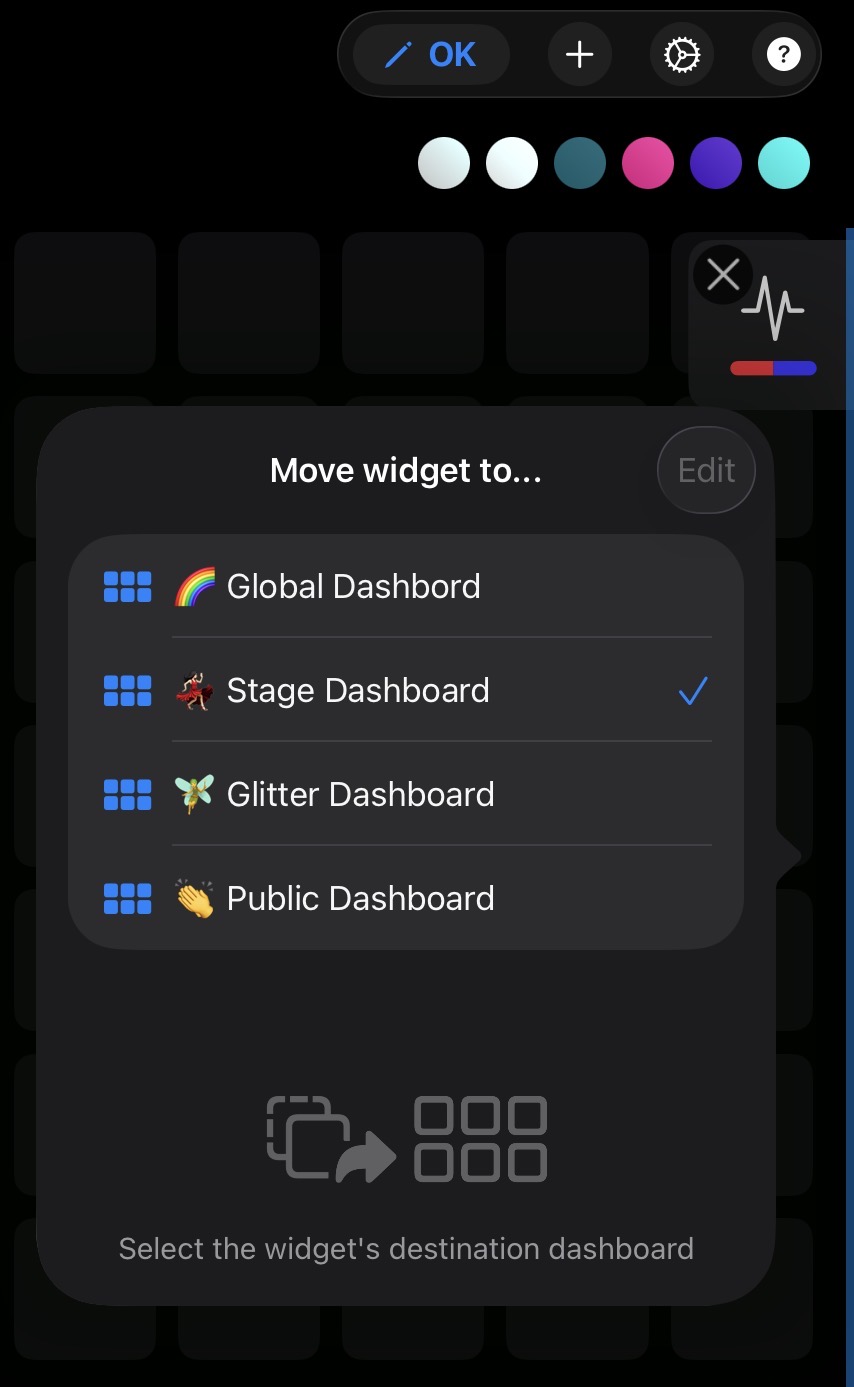
Made a button on the wrong dashboard? No need to recreate it. Activate the dashboard edit mode with ![]() , then press-and-hold the widget and drag it to the left or right edge of the current dashboard. If another dashboard is available on that side, a blue bar lights up along the edge of the screen. Keep holding the widget against the edge for about two seconds — a popup then appears so you can pick the destination dashboard for the widget.
, then press-and-hold the widget and drag it to the left or right edge of the current dashboard. If another dashboard is available on that side, a blue bar lights up along the edge of the screen. Keep holding the widget against the edge for about two seconds — a popup then appears so you can pick the destination dashboard for the widget.
Now that your dashboards are organised, you can trigger their buttons and faders from an external controller.
Visit the documentation to map external MIDI triggers from a keyboard, pad, timecoder or another app.